Terra Avoider – Solo Project
My Brief
For year 3 I wanted to start development of a video game with the intention of releasing it for sale once complete. I chose to take up this task as a solo project which would require me to not only develop the mechanics and gameplay, but also design and create any artwork assets, music and sound effects. Epic’s Unreal Engine was my choice of engine as I feel I have had the most experience with it and the UI is much more intuitive for me than Unity’s
As i had chosen to do this solo, i knew i would have to make it as easy as possible for myself if I was to keep within time limits whilst being able to produce enough content for my course. As i have very minimal skills in 3D model creation, as drawing has never been a strong skill of mine I decided early on to focus on a 2D pixel style as this would hopefully mitigate this weakness and also speed up the production time of asset artwork.
As a big fan of bullet hell style games like ‘Enter the Gungeon’, ‘Hex Machina’ and ‘The Binding of Isaac’, I wanted to make my game similar in terms of gameplay, where the player must dodge incoming enemy attacks whilst also trying to deal damage at the same time. Instead of going down the rogue-like route like the aforementioned games, I chose to focus on arena based boss battles as I’m also a huge fan of MMORPG raid fights like in ‘Final Fantasy 14’ or ‘World of Warcraft’, this would also help me with workload as a single arena will require less assets and level building, i am looking to increase the attacks and mechanics with each fight, providing a satisfying curve in difficulty and hopefully a fun gameplay loop.
The aim of the game is that you are the last hope against an evil invader force called the ‘Avoiders’. The player must survive boss encounters in an arena based location whilst using their weapons to bring the boss’ health to zero. Each level will be another boss fight, which i am aiming for at least 3 in total for the full game.
Below is a timeline I created to follow to keep me on track as to have a proof of concept demo available to play/test.
The budget I set myself for this project was £250, which I deemed to be a realistic figure as publishing the game on Steam would cost around £80 (depending on exchange rate as it’s $100, this is refunded if the game sales break $1000). I would also need to buy a good quality recording device for the sound effects, after doing some research I worked this out to be around £100-£150, this leaves around £20-£70 to spend on sound effects/music if I absolutely had to. I’m currently looking to have the game in it’s final state for testing by July 2024 (Full game testing, I will still be having friends, peers and lecturers test the updates), however this is not a hard deadline, as I know not everything always goes to plan, there may be some fumbles or walls in the future and i would rather delay this than release a game that is not finished.

Why solo?
As stated above, art has never been a strong skill of mine, and I have little experience in terms of music creation and sound design. Whilst there are ways to skirt this issue, like buying ready made assets on the marketplace, or commissioning a professional to create the assets/media for me, i wanted to have a chance to see what i was able to accomplish with the skills i currently have. As I am looking to become a solo developer, I need to know exactly where my limitations lie and how far they can be pushed until I have to relinquish that role due to skill or time constraints. The more I am able to do myself, the less money it will cost and the more control I will have over the project as a whole. This does leave less room to hide, if I fail to hit timelines, or make an unplayable mess, it’s all on me. This is why I chose to not shoot for a huge scope game with multiplayer and amazing graphics with insane cinematic moments, and instead decided upon a smaller, simplistic game concept but with fun and engaging gameplay that does not require vast landscapes or level design.
Another benefit of being solo is the lack of communication that has to occur before work can get started. I don’t have to travel for meetings with clients, saving money and reducing the carbon footprint. Work can begin sooner as there is only 1 person to yay or nay, and there will not be a dilution of ideas or vetoes from ‘higher ups’. However this can also be a downfall as whilst there may not be a dilution of ideas, a team will, most likely, be able to produce more ideas in a shorter amount of time than a single person, the work load will also be able to be spread out over multiple people (not always a positive though when trying to combine code/mechanics), creating a potentially less stressful environment.
Art Design
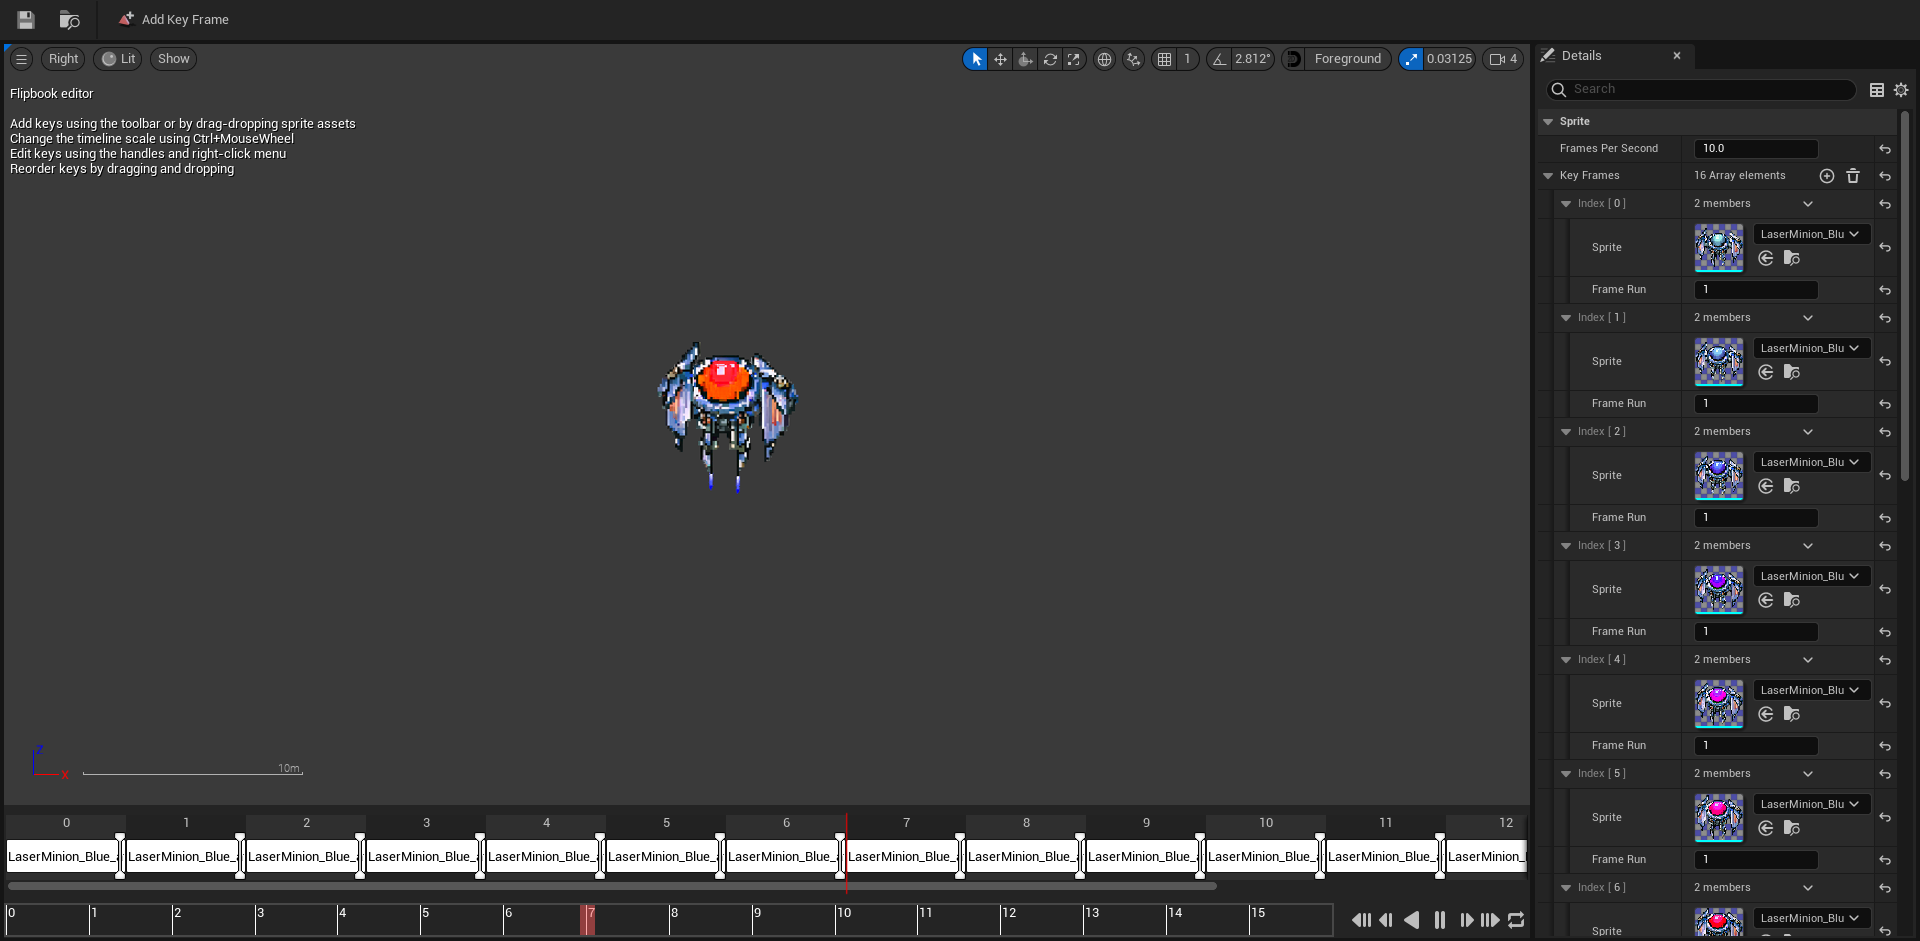
As I decided upon a 2D pixel art style, for animation I relied on the ‘Flipbook’ feature in Unreal engine, this feature allows the user to sequence individual sprites, then set a framerate at which to play them in a loop , the user can also set certain sprites to play over multiple frames to avoid having to waste disk space adding multiple images with the same contents for when zero movement is involved. Using this feature does however mean I have to create and edit each frame of animation individually which is a very time consuming task, though very rewarding when I got to see the animation in motion when finished.
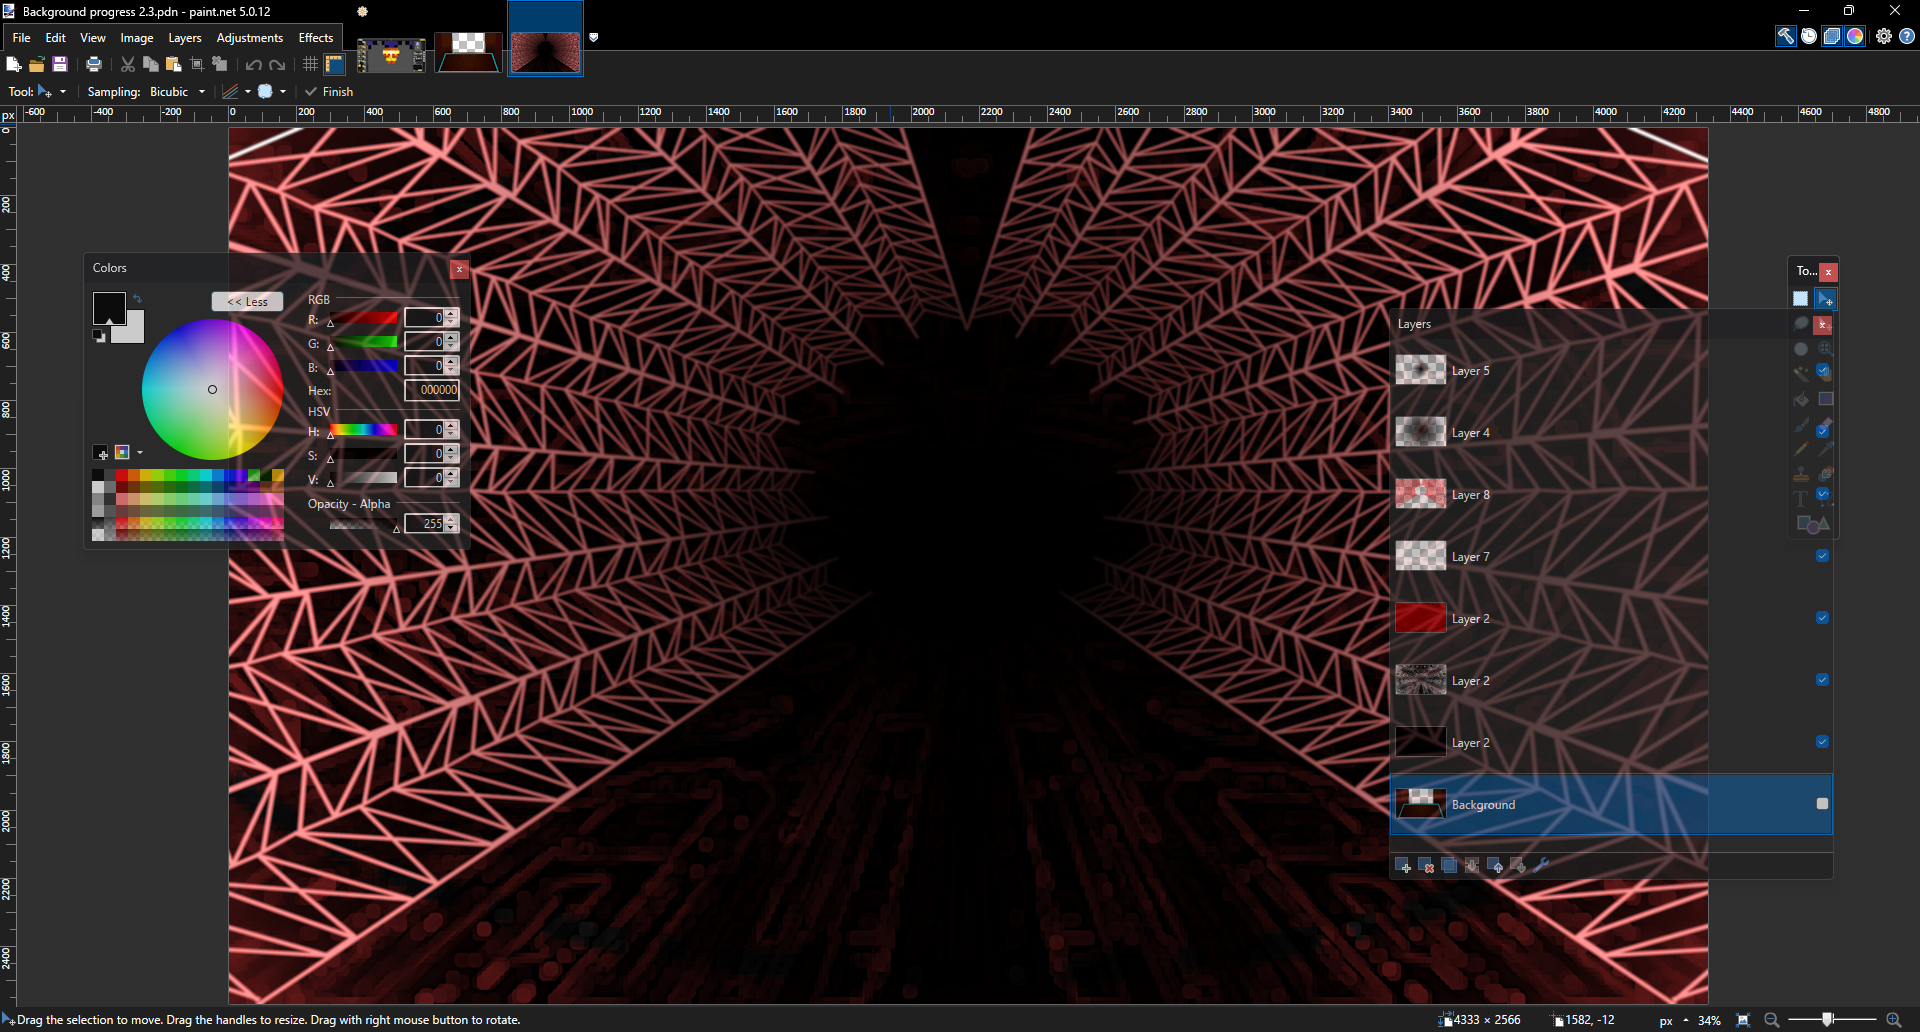
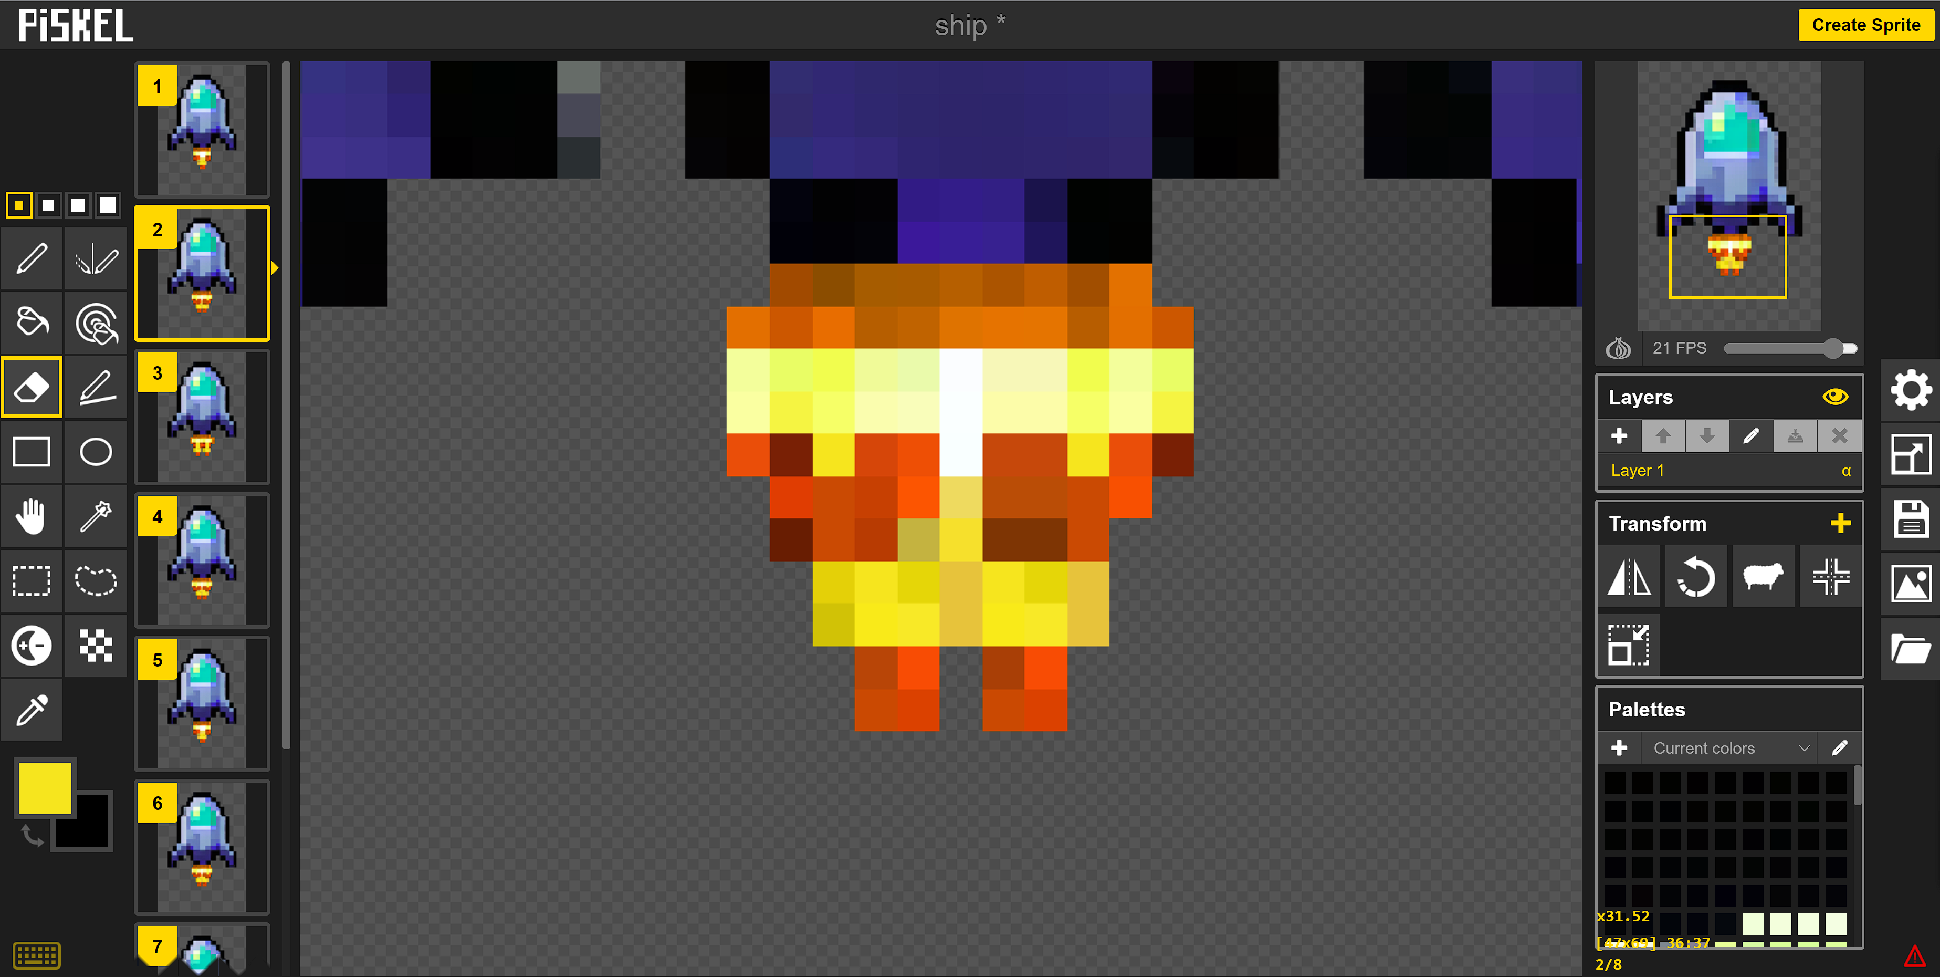
Due to the tight time constraints, i didn’t really want to have to learn a new image editing software, I elected to use Paint.net classic (www.getpaint.net) which is free to use for Windows operating systems that I have the most experience with. I also found Piskel (www.piskelapp.com) to be very useful as well, this is an open source, browser based pixel art creation/editing app, this is where i created the Ship animations. I found it very useful for smaller sprite creation, however the editing features are limited so i mostly used it for creation to export to Paint.net for editing. I also found Piskel to be the best way to resize any sprites as it did not effect the resolution clarity of the images, unlike resizing in Paint.net which tends to cause pixel bleeding, though this could just be user error on my part. One downside with Piskel is the lack of transparency options, which i needed to use a fair bit in this project, thus Paint.net was the primary editing software i used.
There are definitely more suited editing suites that are available for my needs, like Synfig (www.synfig.org) for example, however I do not have enough experience using this yet so I felt it would hinder my progress at the current time. I will be looking into swapping to this software in the future once I feel comfortable using it in a time efficient manner.
For the majority of the animations in the game, i am using the Flipbook feature, however I also used ‘Splines’ which basically creates waypoints through a determined path that can be used for movement or tracking, this is a popular method of simulating traffic in video games, or predetermined NPC (non player character) movement. I used these for some sprite movement instead of creating sprite animations to save time and to better control the destination in engine, rather than work out the measurements to animate it frame by frame. It also can be used to create a more ‘smooth’ animation for things like hover/idle animations and allows the eyes to track the object easier than if they were frame animated (It is possible to get such smooth animations with flipbooks, however the number of frames needed to achieve this is not practical for this project).
I also used the spline function to animate the scrolling image for the opening introduction dialogue by moving the camera down a long image with scrolling text. I will go into the coding of this in the Code development section.
Code Development
User Interface
When I started this project, i wanted to make it as user friendly as possible, and that means giving the player choices. As such I wanted controller support and the ability to change settings both in game and in the main menu screen.
Adding controller functionality wasn’t too hard as Unreal Engine allows this as standard, it’s just up to the developer to add the inputs and make sure to have every menu capture the controller focus to avoid situations where the player has to resort to a mouse. Adding save functionality was also rather straight forward in terms of using Unreal’s own inbuilt functionality, however the more complex part was learning where and when to save/load as to prevent the player losing progress/settings if they exit the game or if there is an unexpected crash. Both the below features are available in the main menu screen and in the pause menu, they are essentially the same code but the pause menu widgets have a few extra pieces to cover the player unpausing the game when these menus are open.
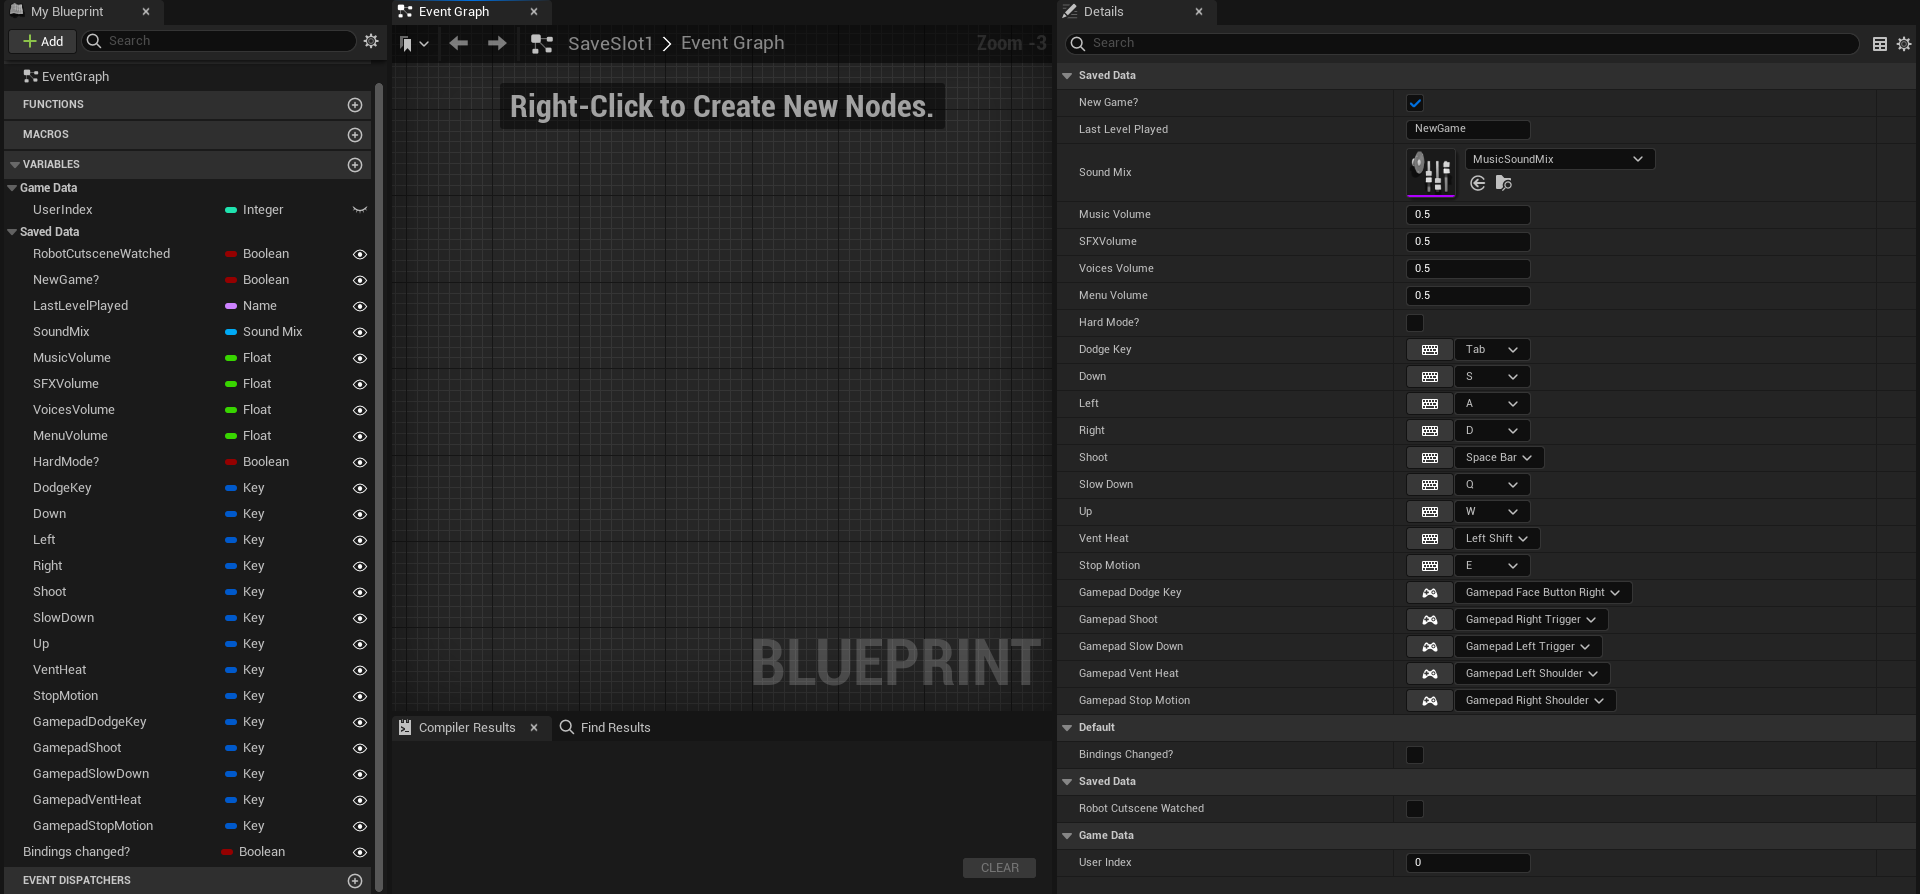
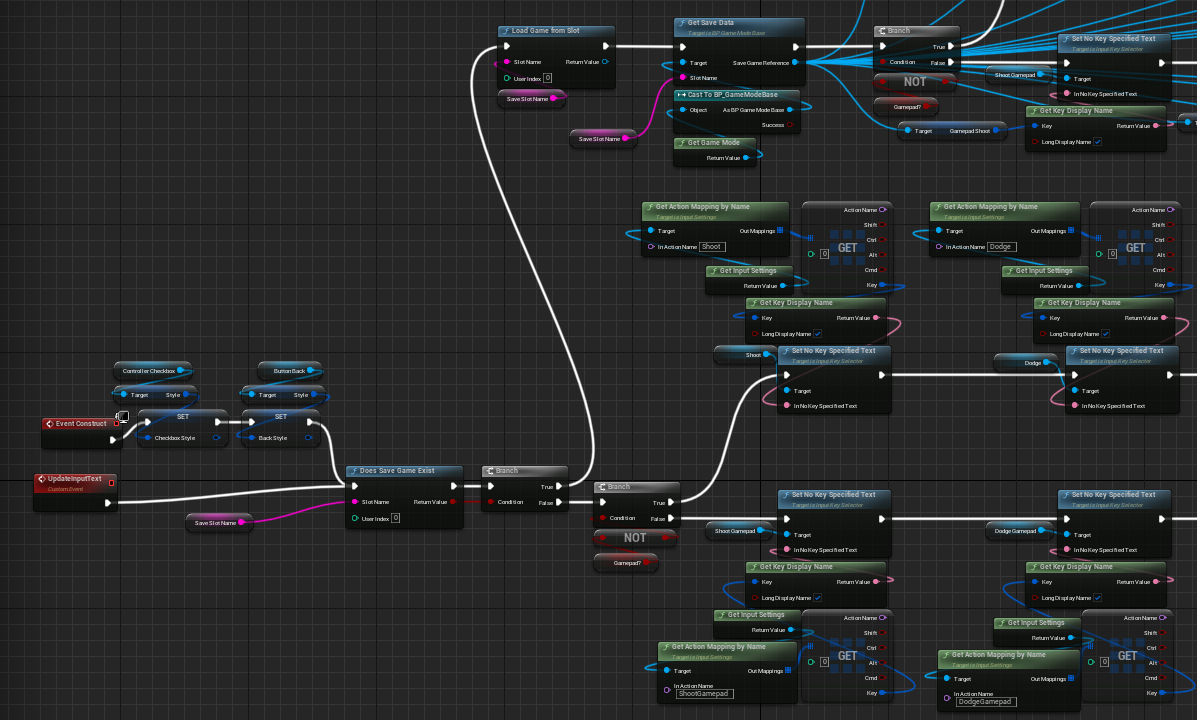
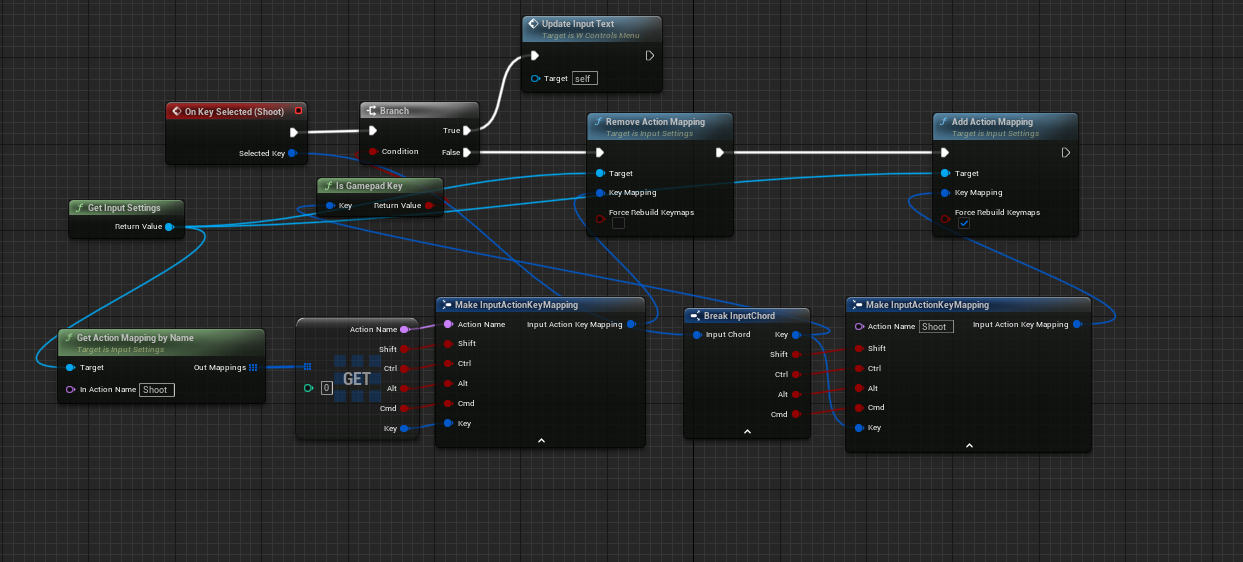
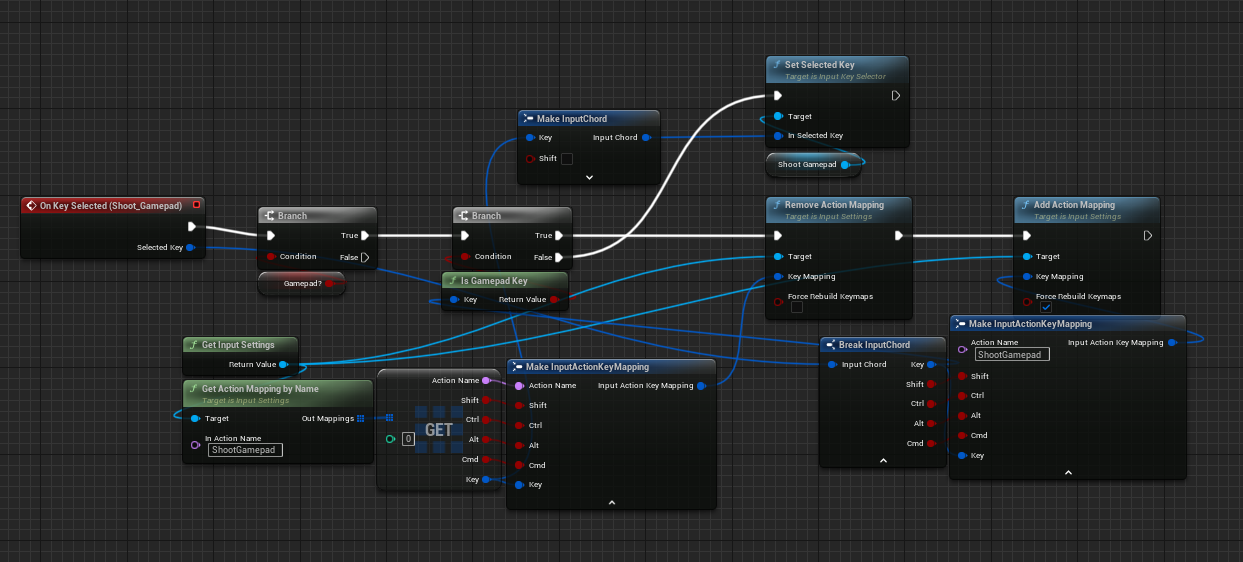
The real difficulty came in creating a method of changing key-bindings/inputs and then having those changes save and reload when the game is restarted, the resulting code needed is incredibly large so I will only show a small amount below to run through the process. I struggled a lot with being able to change the keyboard inputs and also the controller inputs without them ‘overwriting’ each other. Basically, in Unreal Engine, an input (in this case let’s use shoot) can be assigned multiple keys and controller buttons under the single ‘command’, however I couldn’t find a way to edit a specific key-bind, it would change the correct key-bind, however it would move the updated one to the top of the list, which would in turn effect the code that pulls the information to relay it back into the controls menu, resulting in controller buttons appearing on the keyboard options and vice versa. I could have fixed this by having the code extract the current key-binds to then repopulate them every time one was changed, but as this would have resulted in essential double the code, making it far more difficult to read and edit, it would also require a lot of trial and error which would have eaten more time. I decided to just separate the inputs for Keyboard and controller to get the desired result in a more efficient manner.
The sound menu was significantly simpler than the controls, the different sound types have their own mixer, which can be controlled with the sliders, when the player presses the back button (or the widget is destroyed due to the player unpausing) the settings are saved and then reloaded on startup.
The menu transition effect is just a simple opacity timer as seen below. Each possible menu transition has the below code. Once i have finished the second boss, I will be adding another menu screen for level selection, using the save file, each level will be unlocked in this menu after the relevant boss has been defeated, these unlocks will persist even if the player starts a new game instead of pressing continue.
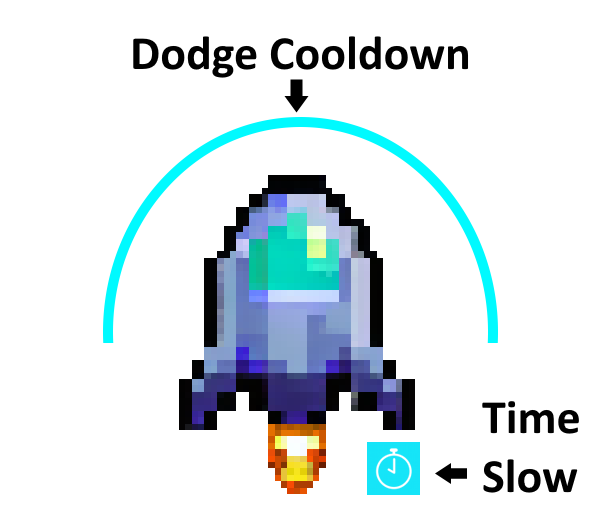
The symbols representing the player’s ability cooldowns are scaled via the relevant float variables that trigger when the ability is able to be used again. I’m not 100% happy with the ‘Time Slow’ icon currently as i feel it is not visible enough, i will be looking at updating this, probably trying to mirror the dodge cooldown with a different colour and getting feedback from my peers/lecturers.
Player Gameplay
With the amount of work needed to achieve all the pieces of a video game, i knew i wouldn’t be able to make the game too mechanically complex, lest I spend all of my time coding instead of working on the other aspects. I do however want the game to be fun and engaging, so on top of basic controls such as movement, shoot and dodge, i chose to add an active reload function which is supposed to represent the player ship venting heat built up from the main weapon firing into a ball of energy to shoot at the enemy, this also activates a shield for the player if they successfully ‘vent’ five times. I also added a time slow activated ability which will aid the player in dodging incoming attacks.

When the player shoots, each shot subtracts 0.01 to a float of 1 which represents the overheat gauge, once it hits 0 a bar appears next to the player ship representing the gauge, the player must hit the ‘vent’ button within the green section of the bar to successfully complete the process and spawn the energy projectile which does increased damage. Feed back I have received has mentioned that the progress of the overheating is not clear so can be difficult to time properly so I will have to look into changing how this is shown to the player, either by adding more steps to the colour change, or adding an audio que as the players attention will not always be on the ship. It has also been mentioned that the effect of the energy ball that is spawned on completion doesn’t feel impactful enough to make it seem worth timing for, I will most likely look into adding more damage to it, or changing the effect entirely, perhaps a shorter range attack, like a flame burst, that adds greater damage or a DOT (damage over time) but introduces a risk/reward element with how close the player wishes to get to the enemy.
If the player hits the ‘Vent’ Button too soon/late, they will be unable to shoot until the gauge replenishes back to full, again this needs to be tinkered with as it seems a little inconsequential due to how fast the bar fills up, I will likely add a time penalty which slows the rate of the bar regen if the player fails to make it a little more punishing.
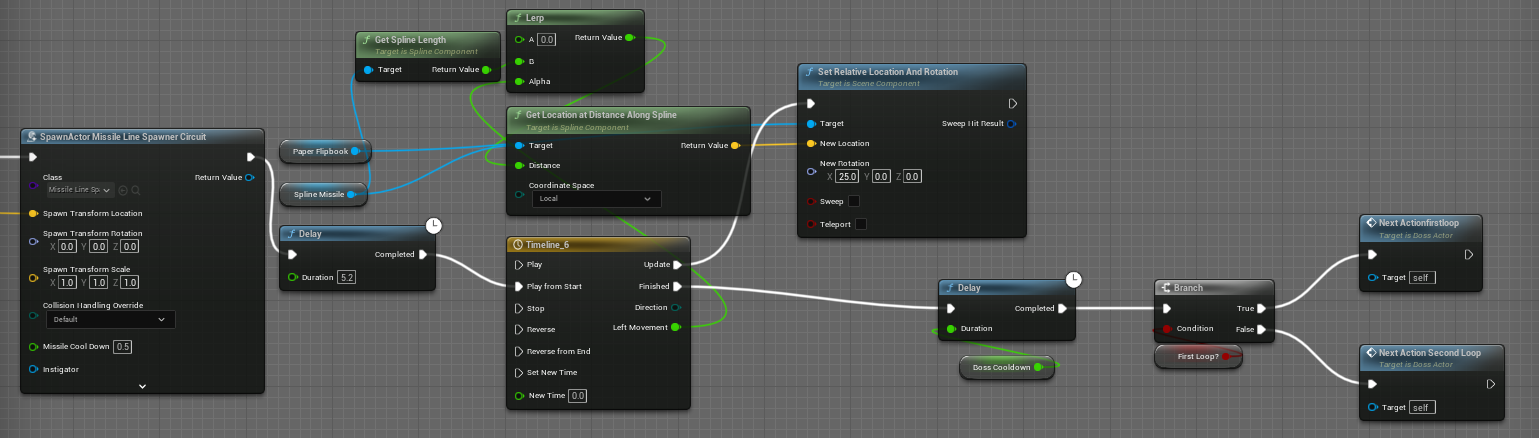
The time slow function was easy to implement using the Unreal engine time dilation function. When the player presses the correct input, the player control blueprint spawns an actor that activates the change of speed of time, this self destructs after X seconds (Or if the phase of the fight is progresses), this could have been built into the player blueprint itself, however I found it caused issues when the player died during the effect, it also means i have a quick way of slowing/speeding time if i want to add it into a fights mechanics in the future, rather than just have to copy and paste the same code everywhere.
Enemy attacks/abilities
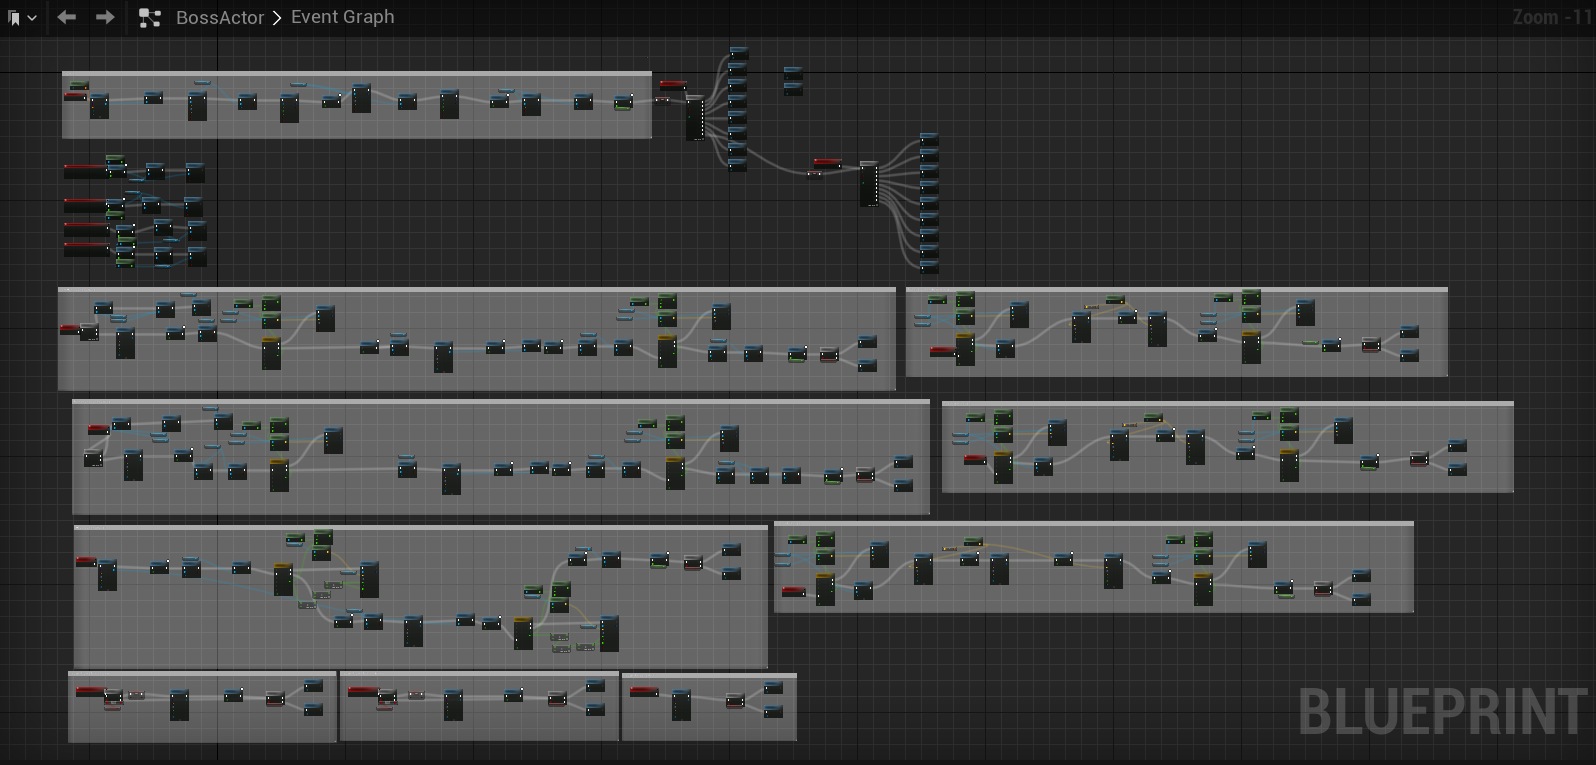
Each phase of a fight has it’s own ‘Boss Actor’ blueprint which controls the fight and spawns the necessary assets depending on the current action. Each main attack is it’s own event and the sequence is controlled by a Multi-Gate system. Each Minion has it’s own controller with a set Multi-Gate event system and checks are made before spawning to avoid multiple iterations of the same minion which would cause either an unwinnable situation for the player, or just look messy with the sprites overlapping each other.

As the enemies use flipbooks and are 2D, having the attacks line up with the animations and appear as if in a 3D environment was a time consuming process to find the best result. I started off trying to do it mostly from the actor editor screens but found this to be too reliant on trial and error as the actual space I am working with is 3D and each part of the game is essentially it’s own layer with their own scaling. Without seeing the final result in the view of the player camera it was impossible to get things looking correct, and movements in the actor screen wouldn’t necessarily behave the same way in the main world space. Below is an image of the game world in a different angle.
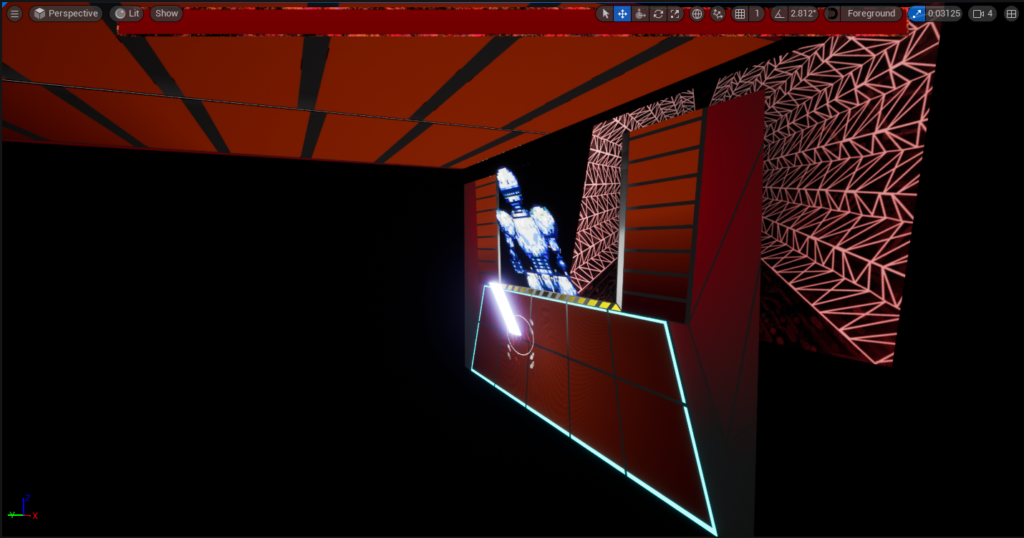
The quickest and most precise way i found to beat this was to build everything onto the level, using the camera as reference, then noting down the coordinates and scales needed to spawn the asset in the correct position/angle to achieve a visually coherent result. Once i had the locations of where damage triggers (areas where the player will die if they stand whilst it is active, timed to the attack visual) and other effects/actors needed to spawn. The reason i am creating separate damage areas instead of using the sprite boundaries/surfaces is to make the space feel more 3D, it wouldn’t make sense for the player to get hit by the top of an explosion cloud as in a 3D space they would be behind it, but not in the explosion radius, some attacks would also become impossible to dodge and it would feel unintuitive and unfair to the player.
Once i have noted all the coords and scales I could then remove all these assets from the game world and work on timing the code to make sense with the animations. To do this you can pull the animation length (in seconds) from the flipbook directly and if I wanted to have something happen during a certain frame of a flipbook, I just had to Divide the number of frames by the fps to get the length in seconds, then divide by the number of frames again to get the length per frame, then multiply by the frame you wish to target to get the delay value. Once I was happy with how the attack looked, I added them onto a Multi-gate to sequence into the fight. The first Multi-gate has a specific order to it, to allow the player to get a feel of the attacks and animations. The second Multi-gate chooses the attack/minion randomly and is of a faster pace than the first Multi-gate.
The first boss is designed to be fairly easy, to get the player used to the visuals and controls, i will be planning on making the future bosses more difficult as a game with no difficulty curve tends to become stale after a while in my opinion.
Sound design
Music
Music is an incredibly important part of a video game experience, misfitting music can absolutely ruin the emotion or immersion of the player whilst music that has been careful chosen to complement the feeling of the current scene can elevate the emotional connection immensely. Whilst I am not really a fan of mainstream music, I am absolutely smitten by certain composers in the video game industry. The likes of Masayoshi Soken (Lead composer and director of Final Fantasy 14 and FF 16), Keiichi Okabe (Lead composer of Nier Automata [Platinum Games]) and Mick Gordon (Lead Composer of Doom 2016 and Doom Eternal [Id Software]) all have very distinctly different styles but each one compliments the context of the game they reside within perfectly. A good soundtrack will stick with the player forever, just ask someone who played ‘The legend of Zelda – Ocarina of time’ (Nintendo) (released 25 years ago) what the tune of ‘The song of storms’ or ‘Epona’s song’ is, I imagine a large percentage, if not all, would be able to hum/whistle it.
Now this isn’t to say I aim to hit anywhere close to the powerhouses listed above, they inspired me to at least give a shot into creating the music for my game, knowing how important it is to get right. As I don’t have a full orchestra to hand, I decided to use Bandlab ( www.bandlab.com ) which allows the user to create music using Midi (Musical Instrument Digital Interface) standards which is the process of using digital instrument sounds in a sequence to create music (Demo in video below).
Whilst I do have some experience in playing instruments, I don’t really have any in terms of writing/composing so the music creation was a fairly lengthy process. I wasn’t looking to create anything too complex, for time reasons, so went for repetitive melodies that could be looped. The music’s purpose is not to be focused on and is really only there to fill the silence in the background, however I wanted the music to reflect the phase of the fight at least a little. For example, in the first phase of the first boss, i used more mechanical and glitchy sounds in the music and the tempo is fairly slow as the boss is robotic and it’s attacks are slightly sluggish. Phase 2 of the fight is a bit more urgent and frantic as the playing arena gets smaller as the fight goes on, making it harder to dodge, the mechanical sounds are also absent as the ‘robot’ sheds it’s shell and reveals a biological enemy. Each song has 2 files, one with a beginning and one without, the file without the beginning is used to loop as it just sounds odd and jarring otherwise.
Sound Effects
For the sound effects, I knew I would need to purchase a device that could record high quality sound files, as I only had access to headset microphones. I chose to opt for a portable option in the form of a voice recorder, this would allow me to record many more sounds than if I had decided on a high quality microphone. After researching on several different sites, I landed on purchasing the H1N Zoom (Found here) as it had great reviews on different shops and it was recommended multiple times on Reddit, it was also well within my budget (at time of purchase it was £110).
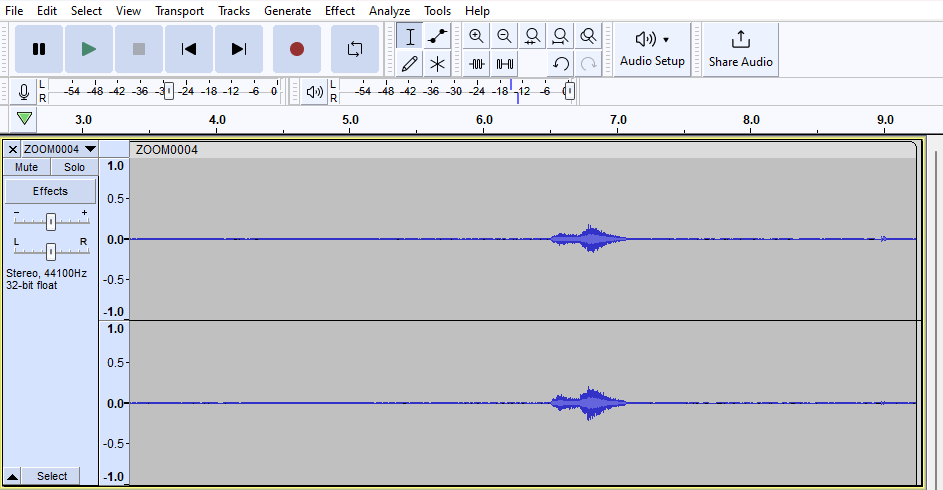
Using the voice recorder, I recorded various sounds around the house and my own voice, then used Audacity (Audacityteam) to edit the clips (things like the pitch, tempo, direction etc.) to create the sound effects. For example, the steam sound effect was created by editing the sound of a wine saver vacuum seal release.
The same Sound was used to create the Minion’s portal opening and closing effect.
Some sound effects I will need to update as they are not clear or good enough quality in my opinion, for example the dodge and time slow cooldown noises are a bit too tinny and require a more technological feel that is more audible for the player to hear. These abilities will be used quite a lot in the game so a sound that is displeasing to the ear will just bring down the playing experience.
Overall i didn’t really have any tactics when editing the clips, it was mostly me making small adjustments until I reached something i was happy with, it involved a lot of trial and error, but overall did not take a large amount of time as the sound clips were so short.
Conclusion
I am extremely pleased with what I have created so far, whilst I know there is still mountains of work left to do to hit the intended testing date of July 2024, I believe the pace i have set is acceptable and due to the work already done, my progress should speed up due to the core game build is in a playable state. I do need to update some mechanics and assets to get them in a state I am happy with and to address some of the criticisms the game has already received, for example the cooldown signals and the ‘vent heat’ buildup visualization and outcome.
I am getting a good idea on where my weak points lie and where I may need to look into getting assistance from other professionals in the form of commissions or team up.
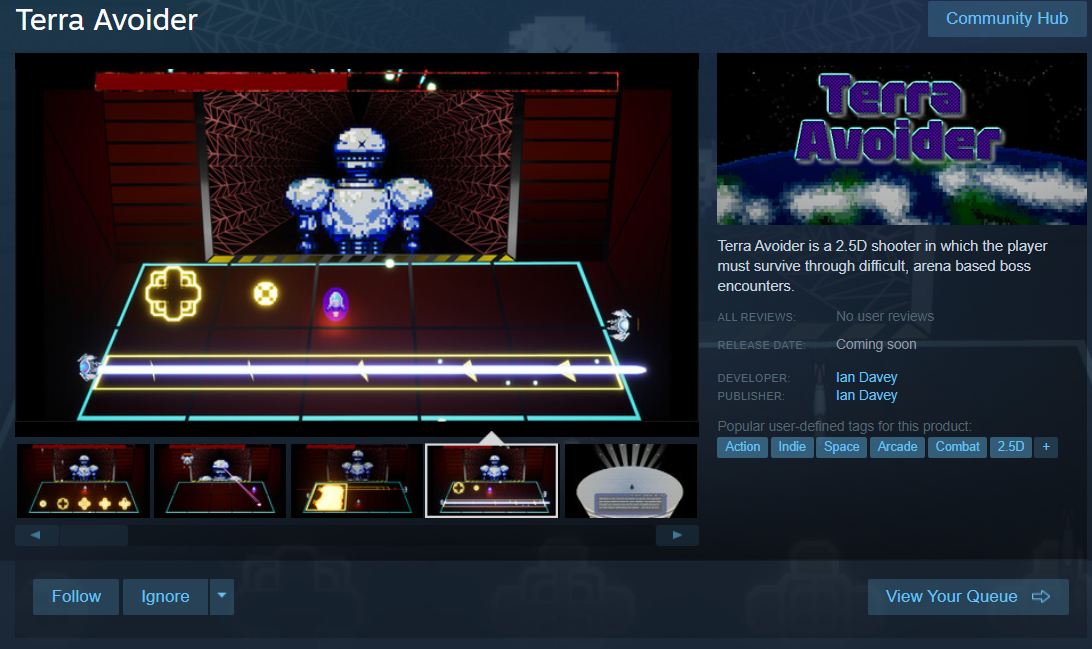
I managed to hit my target of creating a Steam page and releasing a demo on it by the end of semester 1. The first boss encounter is finished with the model of the second boss nearly done. it took me a while to work out the ins and outs of the steam packaging methods (how the files need to be set out and uploaded onto their system), but after a lot of reading their manuals and some trial and error (and a touch of help from their support), ‘I’ worked it out and have been able to successfully update and patch the demo to remove reported bugs. To avoid any issues with version control I created a separate instance for the demo as a new Unreal Engine project so I could progress the main game whilst also having access to the demo for patching purposes. Below are some of the recent stats from the Main game page, wish-list and demo downloads.
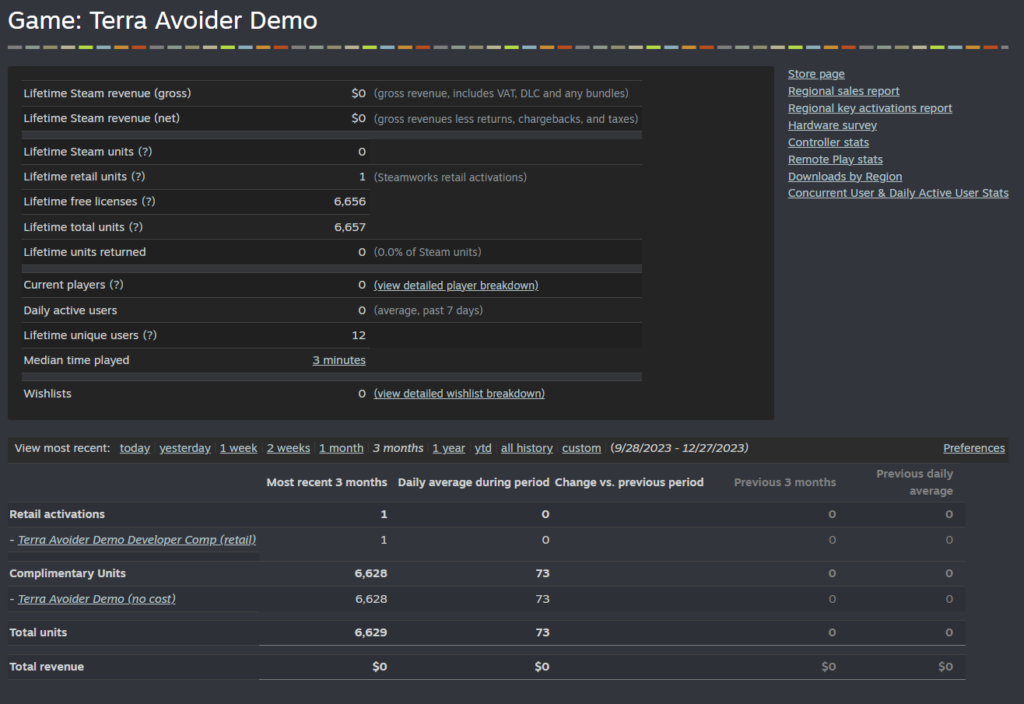
The image above shows the demo’s stats since it’s release on steam (30th November), whilst there have been a lot of activations (claiming the demo), only 12 have downloaded and started the application (most, if not all of these will be people I know most likely) with a median play time of 3 minutes. Whilst the demo is very short, it should take longer than this so perhaps people are being put off by something, I’ll have to request further feedback from future testing phases.
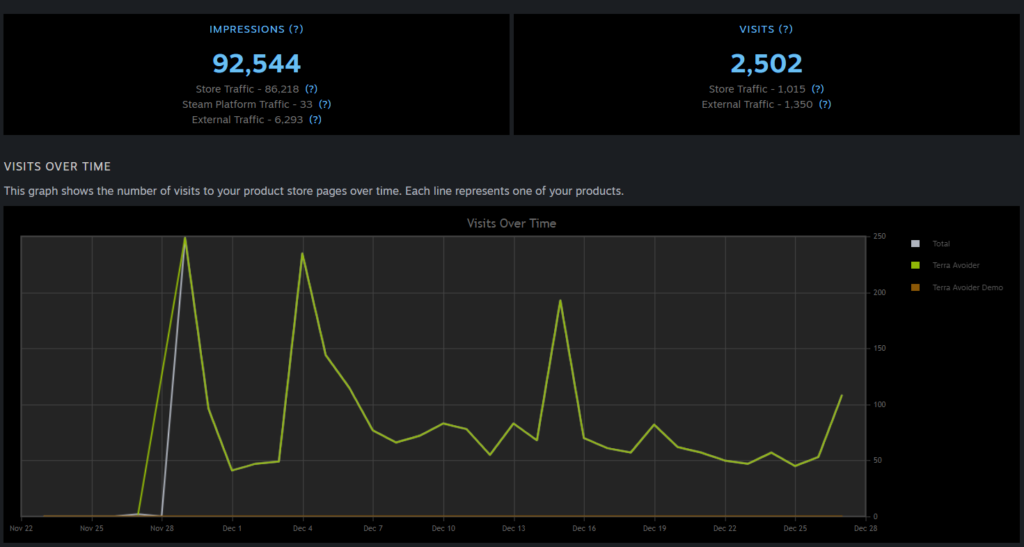
Above you can see the impressions the full game store page has received (as you can see, the ‘Terra Avoider Demo’ has 0 impressions as demos seem to not have a separate steam page, which is odd as steam required me to create assets and page details as if there would be one, I’ll have to do a bit more research in case it is a bug?). I imagine the majority of these impressions to be bots, due to the fact as soon as my steam page went live, many websites and wikis were updated with the information pulled from the steam store.
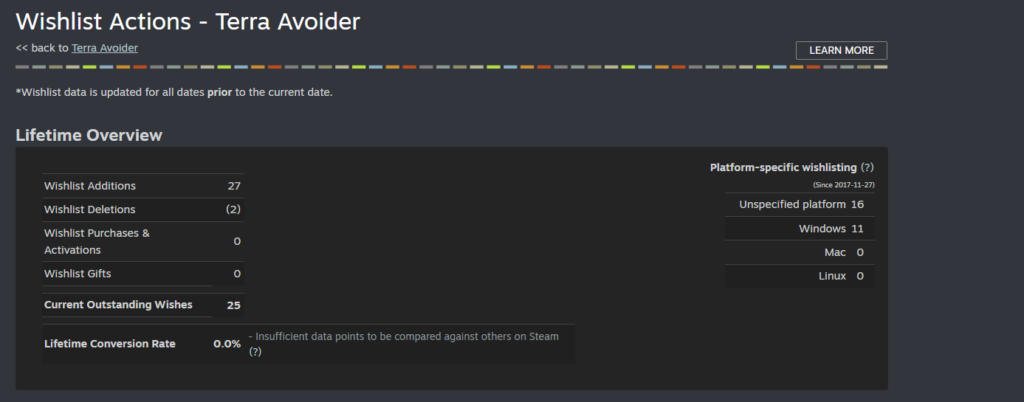
Above we can see my current wish-list total, which i hope to get to at least 100 by the end of semester 2. One of my failings this semester would probably by on the side of marketing the game. I started off quite well with building upon my Instagram account, however towards the end of the semester my posts became less frequent due to my work load. I will have to put a lot more effort into the marketing side from the start of semester 2 if I want to hit my wish-list goal and increase the potential of making decent money from this project.
I have yet to work out the pricing of the final product, however I am currently thinking around the £2-4 mark, however this will become easier to work out once the final product is finished, I would like to make sure I am charging a fair amount for the length and quality of the game.
The Steam page can be found here, where the demo is available if you wish to try it out.